[AdSense-A]
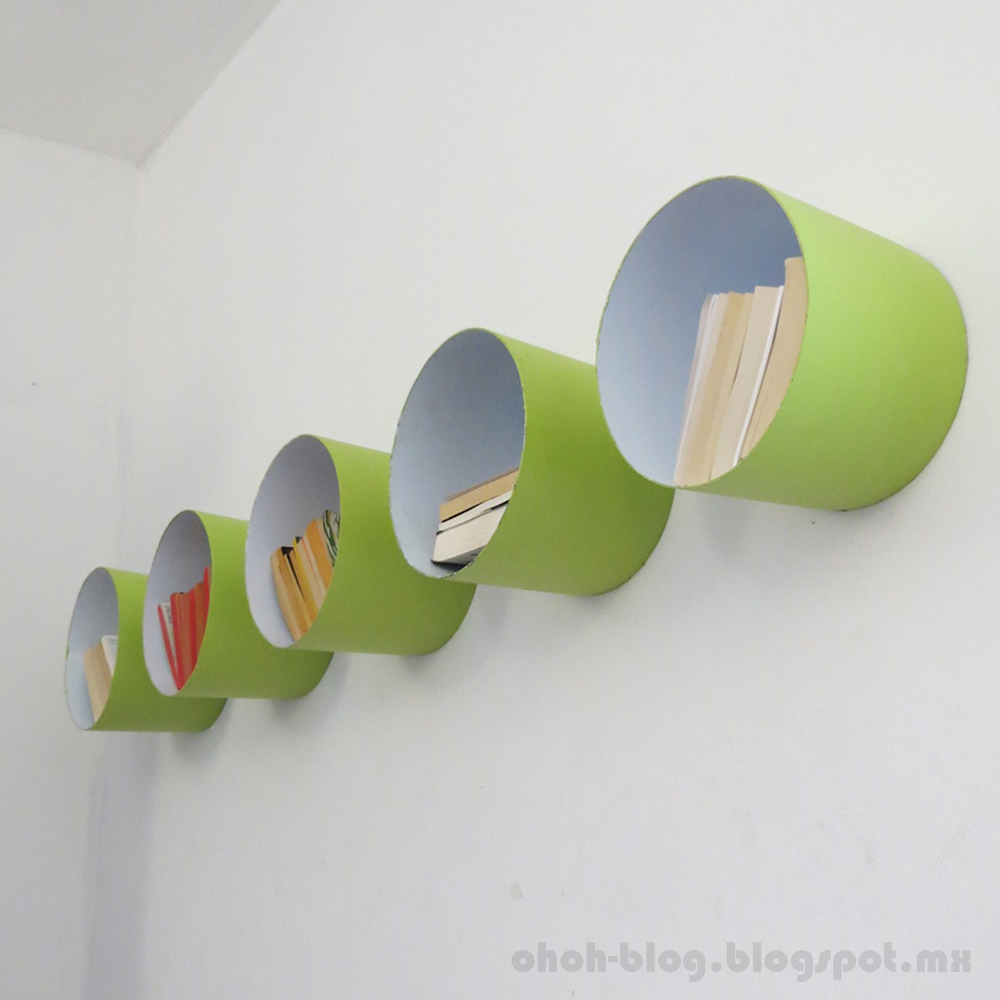
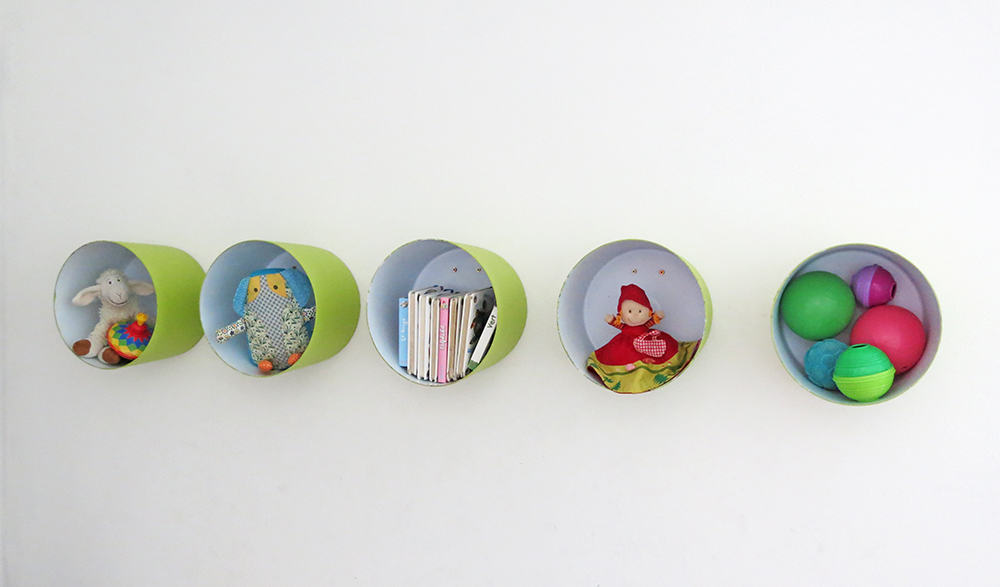
With the hope of keeping the game room in order, I made those shelf with paint buckets. It’s easy and economic to do, and it gives a place to store smalls items. I like upcycling bucket so if you are looking for more ideas, you may like these side tables and this stool!
Con la esperanza de mantener la sala de juego en orden, hice estas repisas con cubetas de pintura. Es muy fácil y económico de hacer, y da un lugar para guardar los objetos pequeños. Me encanta recyclar cubetas de plastico, tal vez te gustara también estas ideas: unas mesitas y un taburete, ambos hechos con cubetas.
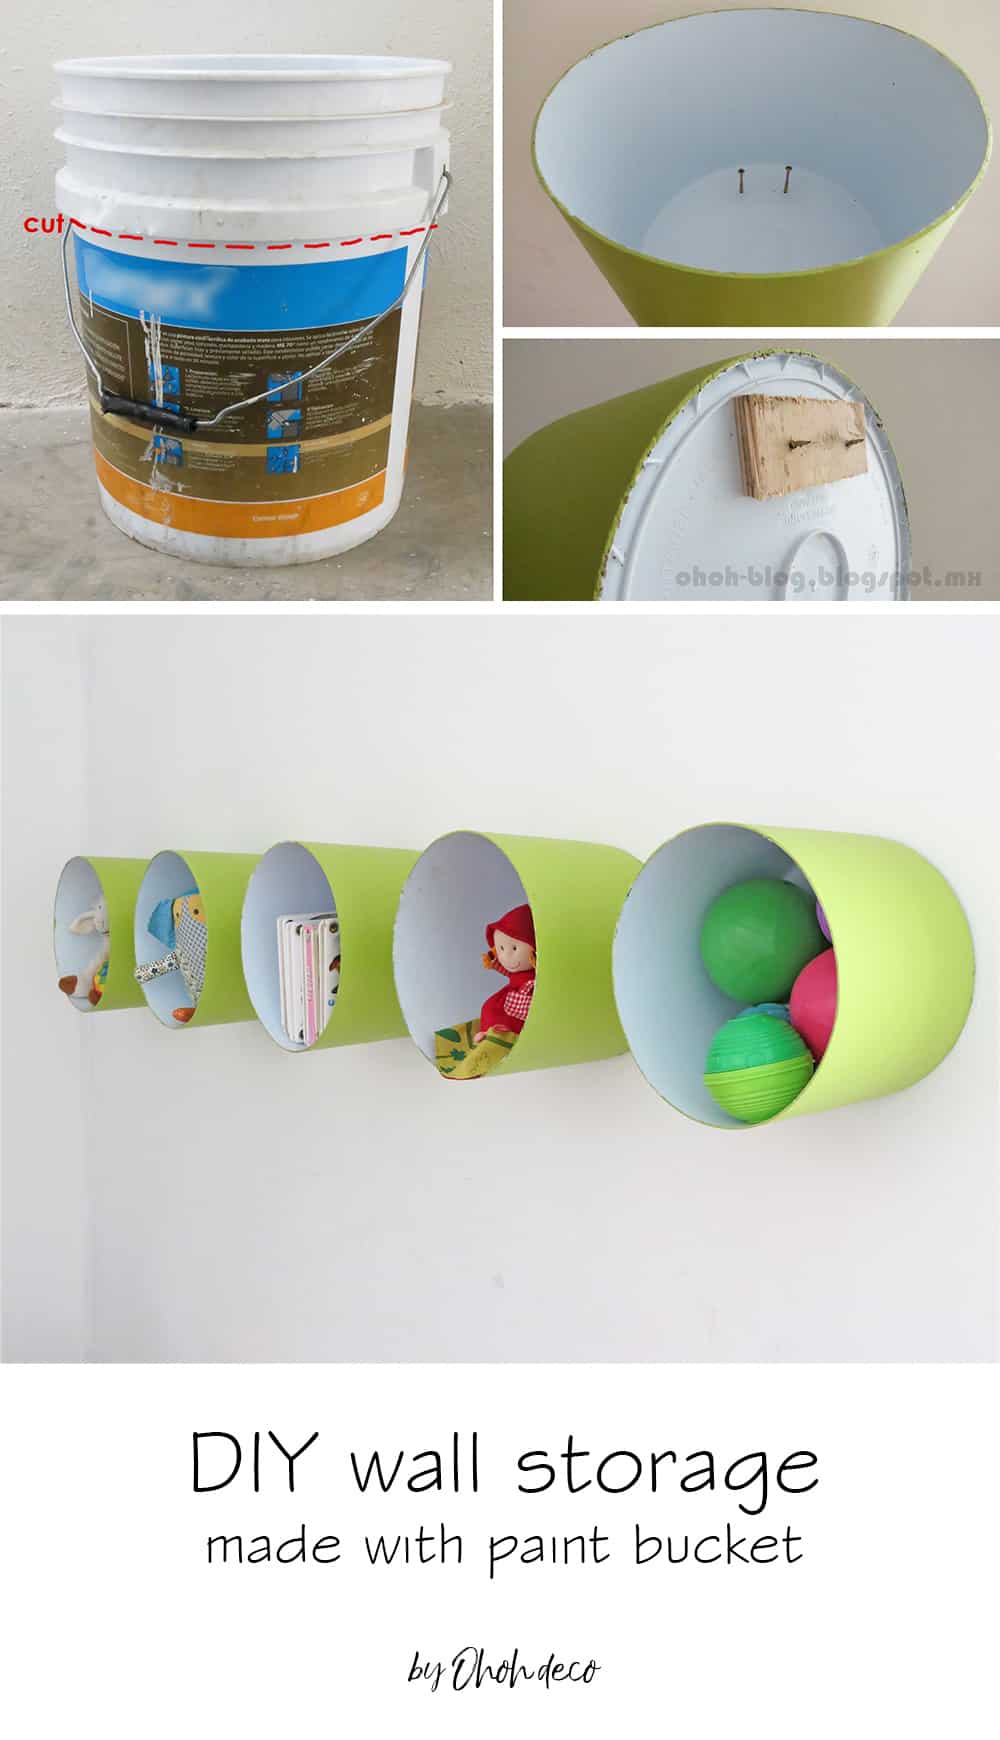
A small tutorial / un pequeño tutorial:
Clean and remove label of the bucket, cut the top part (using a saw or an electric saw…be careful).
Paint the outside with a paint for plastic.
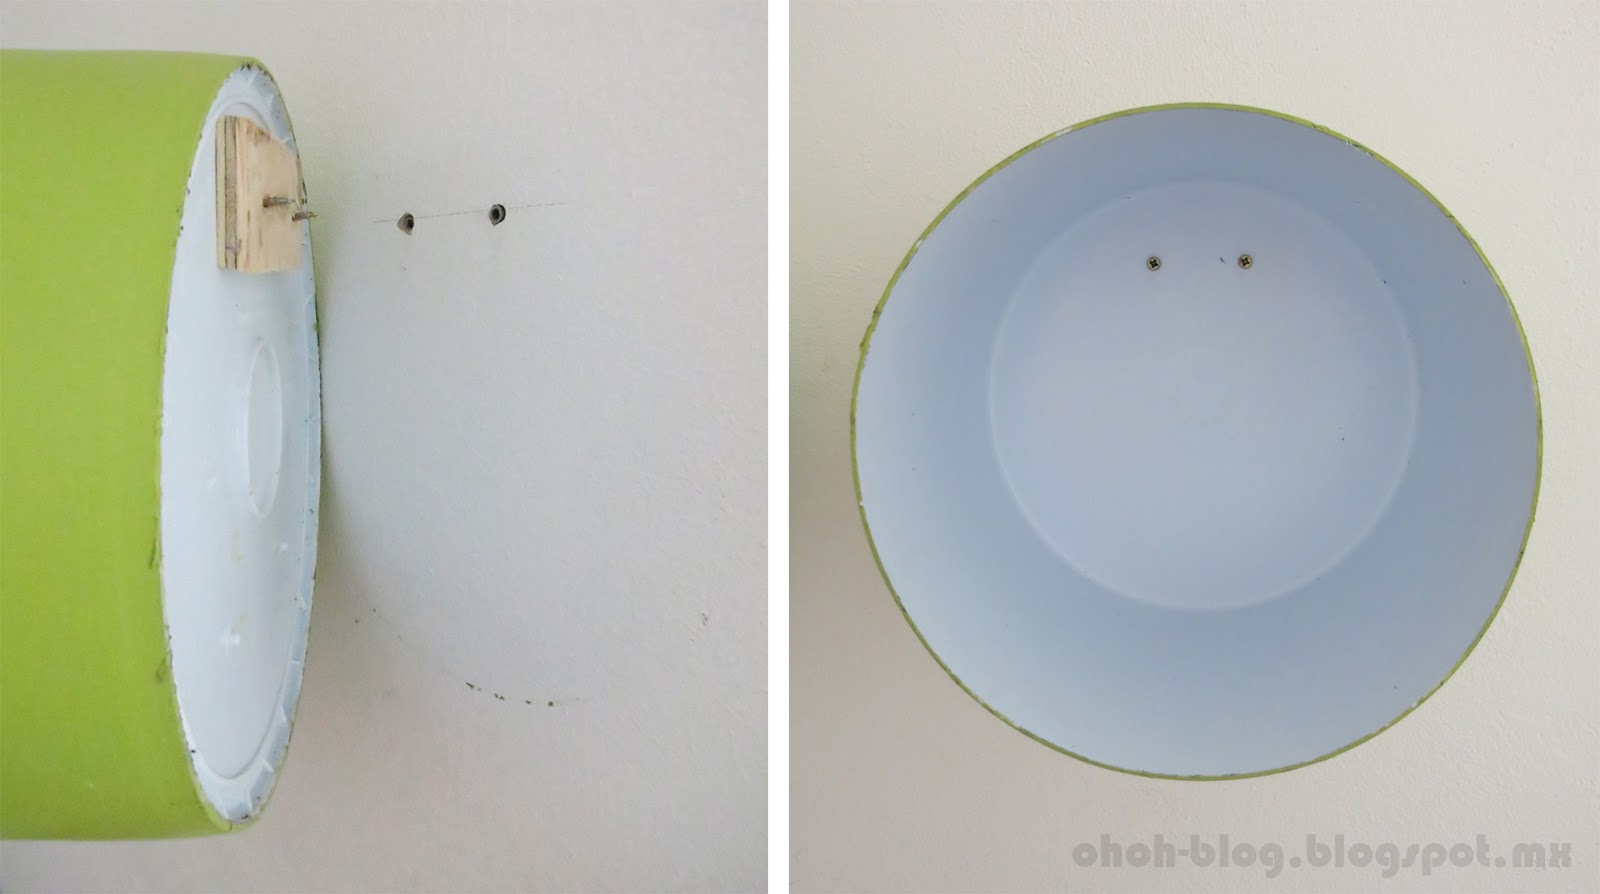
Make two holes for the screw and strengthen the back with a piece of wood.
Limpiar y quitar la etiqueta de la cubeta, cortar la parte superior (con una sierra o una sierra eléctrica … ten cuidado).
Pintar el exterior con una pintura especial para plástico.
Hacer dos agujeros para los tornillos y fortalecer la parte de atras con un trozo de madera.

[AdSense-B]
Fix in the wall with with screws and plugs.
Fijar en la pared con tornillos y taquetes.
Et voila!
Pin it for later!
[AdSense-C]
Amaryllis

I love this idea! Brilliant!
OH! OH! This is such a cool idea. Came over from Roadkill Rescue.
Thanks!
Such a cute idea- I love it!
Saw you featured at Roadkill Rescue, and wow, these are awesome! They look great and are a fantastic way to reuse old buckets. Love it!
Debbie 🙂
Thank you!!
Amazing article. Thanx 🙂 Addition Elle Coupon Code
i will try to do this at home..
Filled with fantastic ideas
Perfect Idea !!!
Thank you!
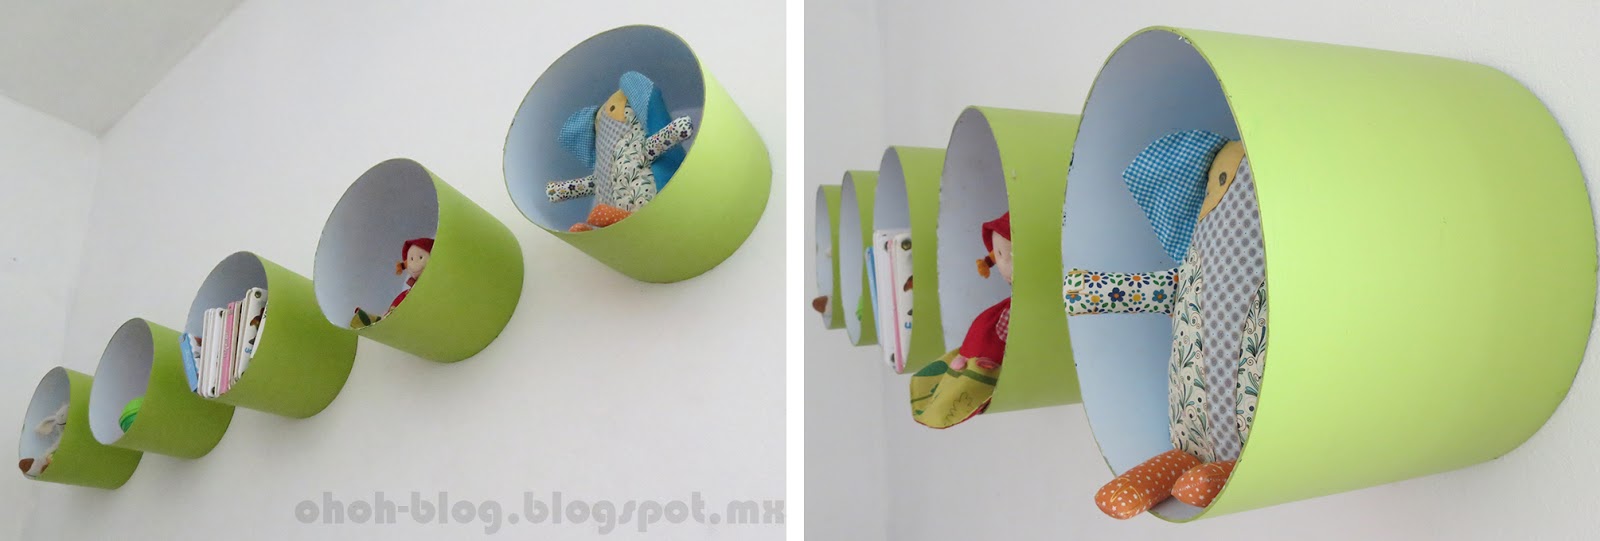
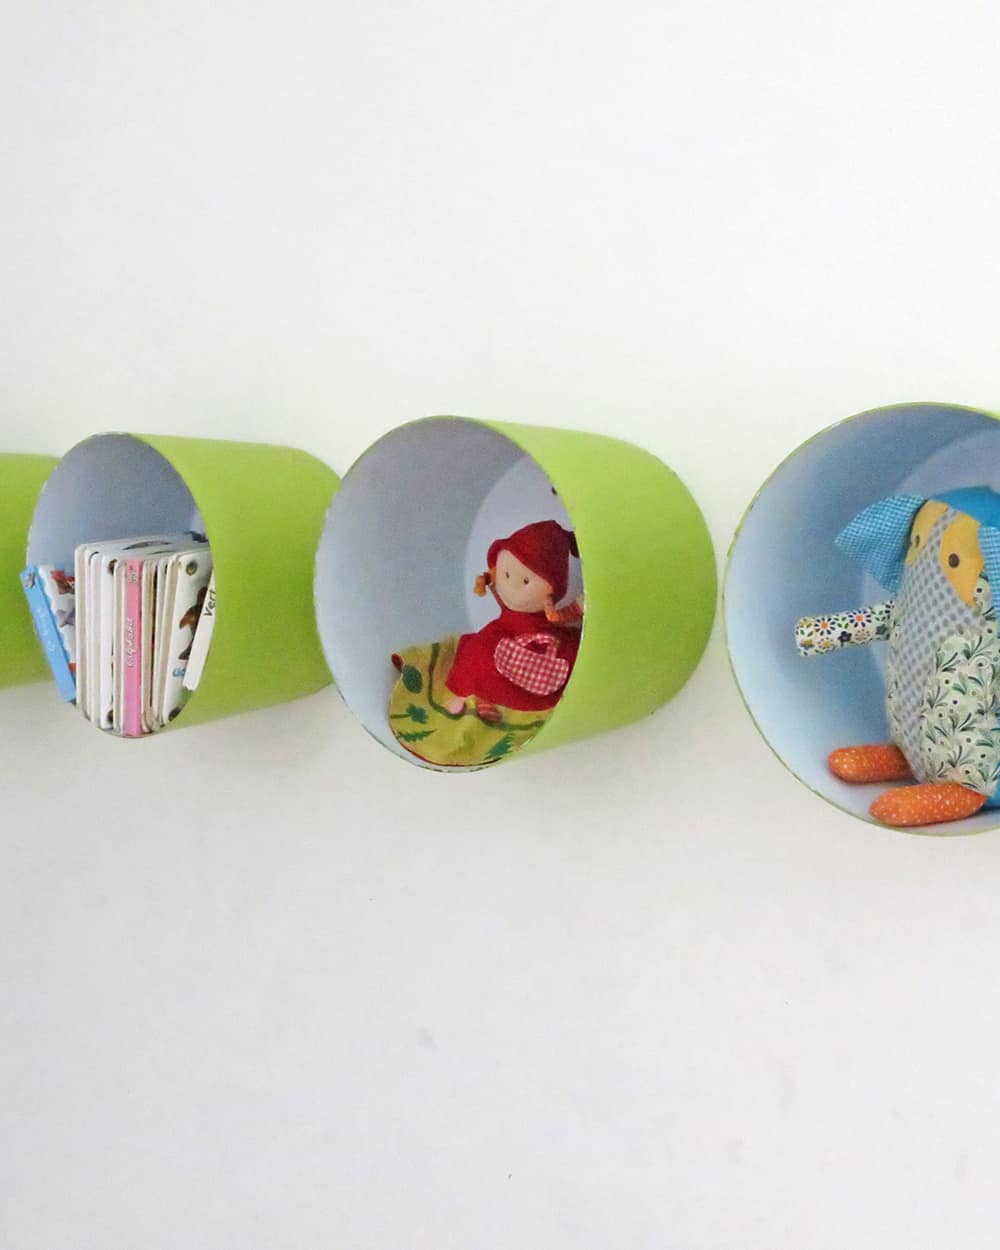
I LOVE the little doll in the second bucket from the right. Did you make her? Do you have a link, pattern, or tutorial? Thanks!
I love it too, it's Little Red Riding Hood and when you turns it there is a grandmother/wolf's doll, awesome! But no, I didn't made it… it comes from the Lilliputiens – http://www.lilliputiens.be – This is a Belgian brand but their products are sold in several places and they also have an online shop.
Thank you so much for the information on the Little Red Riding Hood. I love your bucket shelves too!
I'm going to try this with coffee cans and tin cans for a variety of sizes
That's a great option if you want to store small items!
Thanks so much for posting this, this is exactly what I have been wanting to do! Happy new year!
Hey Thomas, I'm glad you like it. Happy New Year too!
I love this!
Thanks Mary! Those shelves are very fun to make!
How could I attach to concrete wall in garage?
Hello, walls in my house are concrete too. So I just put plastic anchors into the wall an then screw the buckets.
CooL Idea! I'm gona try it. thanks for sharing.
good and amazing idea.
good post